Click to close
The Basics
- First Steps
- Create a lesson
- Preview
- Create Options
- Study Aids
- Account profile
Teaching Online*
- Introduction
- Assign Lessons
- Grade Lessons
- Messaging
- Online Study Aids
- Collaborating**
Deeper Dives
- Creating more classes
- Differentiating Instruction
- Sheltered Instruction
- Tasks
- Custom Dictionaries
Master Teacher
- Units
- Standards
- Monitoring goals
Administration
- Creating a School
- Using the School Dashboard
- Teacher Accounts
- Assistant Principals
- Class Reports
- Student Reports
- Adding Licenses
Glossary
- Terms
Teacher Support
- Contact Us
*Requires a Premium Account.
**Requires a School Account.
Get Started
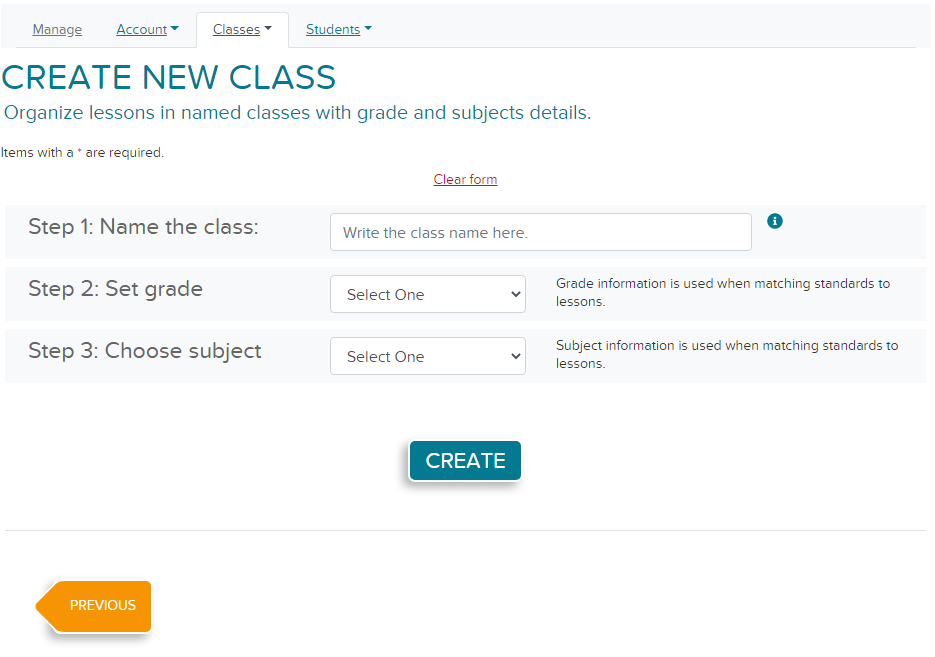
Lessons are created and stored in classes, so you must create a class before you can write a lesson.
It may be helpful to include a date in the class name. You may create as many classes as you need.
- Click the "Get Started" button on the homepage and register.
- Log on and click the "Manage" icon at the top of the screen.
- Click "Create/ Edit Classes."
- Click "Create a new class," complete the fields, and click "Create".
- Continue to Create a lesson to make a lesson from text or web page.
Create lessons
A. From text
 B. From a web page
 Create a Lesson from a video
A. From text
You can write a lesson from any digital text that can be copied and pasted.
- Find a reading passage that you would like to create a lesson for and copy it to your computer's clipboard (Text in PDFs and image files cannot be used.)
- Copy the text for your lesson to your computer's clipboard.
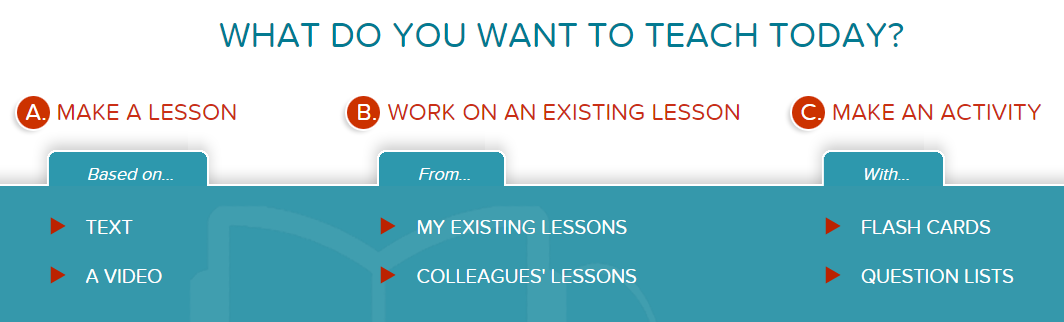
- On Lessonwriter.com, click "Teach" on the top navigation bar
- Click "Make a lesson based on text"
- Complete the form and click the "CREATE FROM THIS TEXT" button to continue to Preview Lesson page.
You can create a lesson from any web page that contains text by copying and pasting the url.
- Find a web page that to write a lesson from.
- Copy the url (e.g., https://www....) to your computers clipboard
- On Lessonwriter.com, click "Teach" on the top navigation bar.
- Click "Make a lesson based on text", then click the "From web address" tab.
- Select the class and paste in the url, then click "Create from this url" to continue to Preview Lesson page.
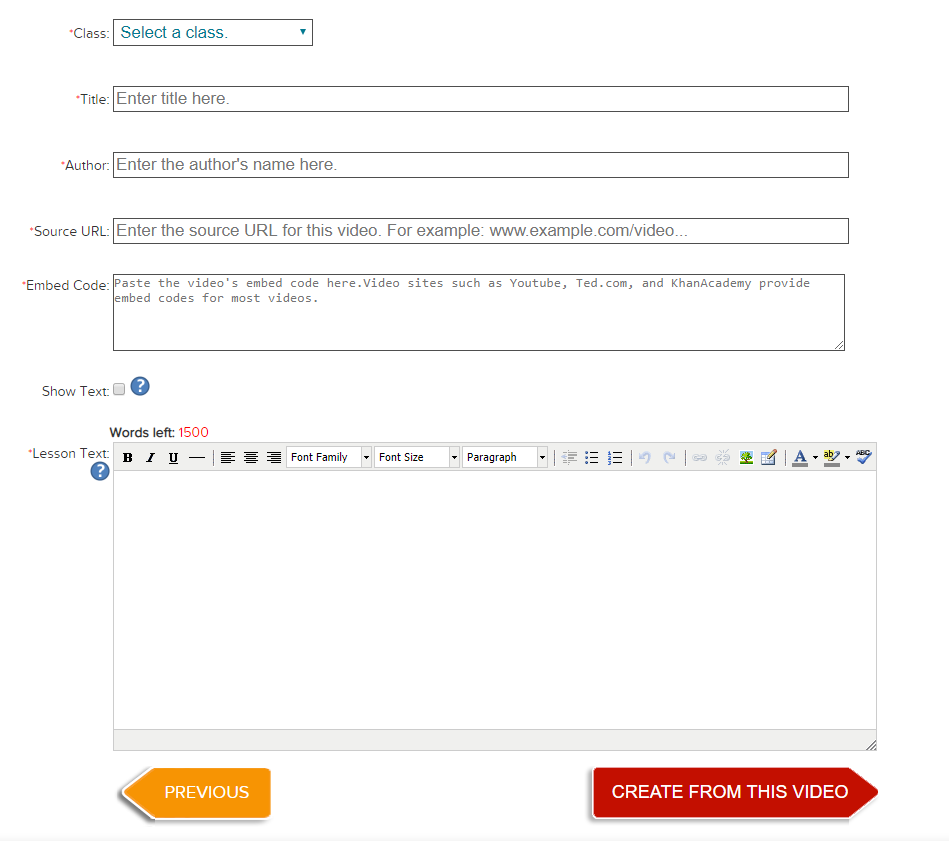
Video lessons may be projected in the class room or taken online (Online lessons require a Premium or School account.)
If a transcript is available, Lessonwriter will generate complete lessons based on the transcript.
- Copy the embed code for the video onto your computer's clipboard.
- Click "Teach" on the top navigation bar
- Click "Make a lesson based on video".
- Follow the instructions for the input page, making sure to paste the embed code into the correct spot.
- Copy text to go with the video and paste the accompanying text into the box.
- Confirm the lesson content and select any lesson planning options on the "PREVIEW LESSON", the click the "CONTINUE" button.
Preview Lesson


The next steps are to preview the lesson and apply any organizational or instructional options.
- Scroll through the reading passage to make sure the text is correct.
Next, apply any options that will help you.
- Option 2: Add the lesson to a unit.
- Option 3: Apply any custom dictionaries you have created to the lesson
- Option 4: Add an Objective, Aim, Keywords and Standards for your lesson plan.
- Click "Continue".
- Continue to choose a planning option
Choose between 3 lesson planning options:

- Express, where Lessonwriter handles everything
- Standard, in which Lessonwriter handles the literacy instruction and you craft the comprehension tasks
- Detailed, where you can review and update every step
Express Lessons

If you want to create lessons quickly, you can create Express Lessons with just a few clicks.
- Click Express mode
- Customize design elements
- Review lesson sheet and confirm differentiation groups
Standard Lessons

Standard Lessons allow you to write your own questions for the lessons, but still create them quickly.
- Click Standard mode
- Create tasks. Assign to differentiation groups
- Click "Save and continue"
- Customize design elements
- Click "Save and continue"
Detailed Lessons

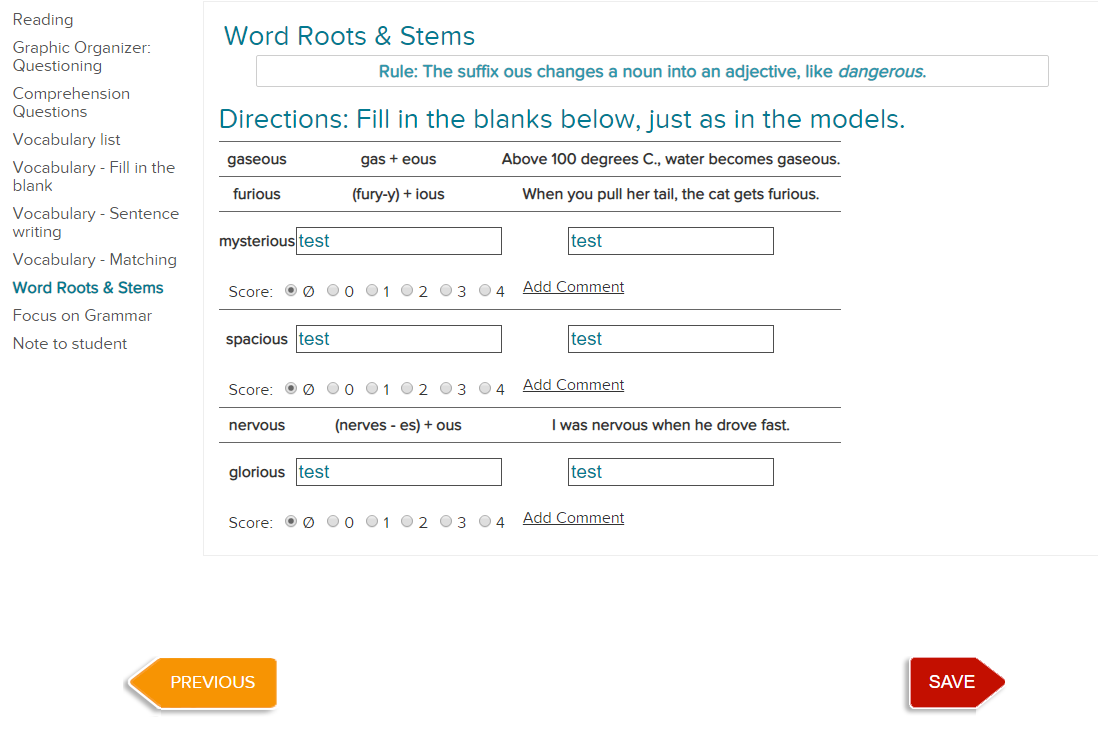
If you choose Detailed Lessons option, you will be able to handle every part of the lesson making process from vocabulary exercises to grammar points.
- Click Detailed mode
- Select vocabulary words and exercises, Click "Save and continue"
- Select prefixes, suffixes and example sentences; Click "Save and continue"
- Select phonemes and assign to differentiation groups; Click "Save and Continue"
- Select grammar points and example sentences; Assign to all differentiation groups; Click "Save and Continue"
- Create tasks. Assign to differentiation groups.
- Click "Save and continue"
- Customize design elements
- Click "Save and continue"
Account profile
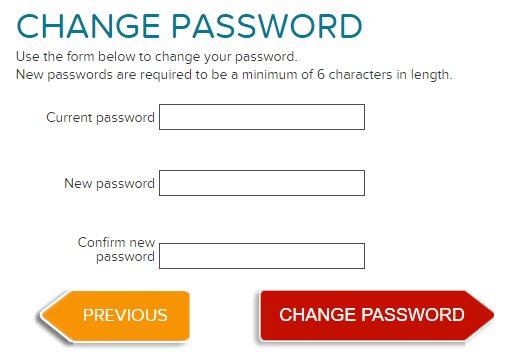
 Change password
You are able to edit your account information anytime after you register to LessonWriter.
- Go to Manage
- Click "Account profile"
- Edit information
- Click "Save" button
- Go to Manage
- Click "Change password"
- Enter the existing and new password
- Click "Change password" button
Study Aids
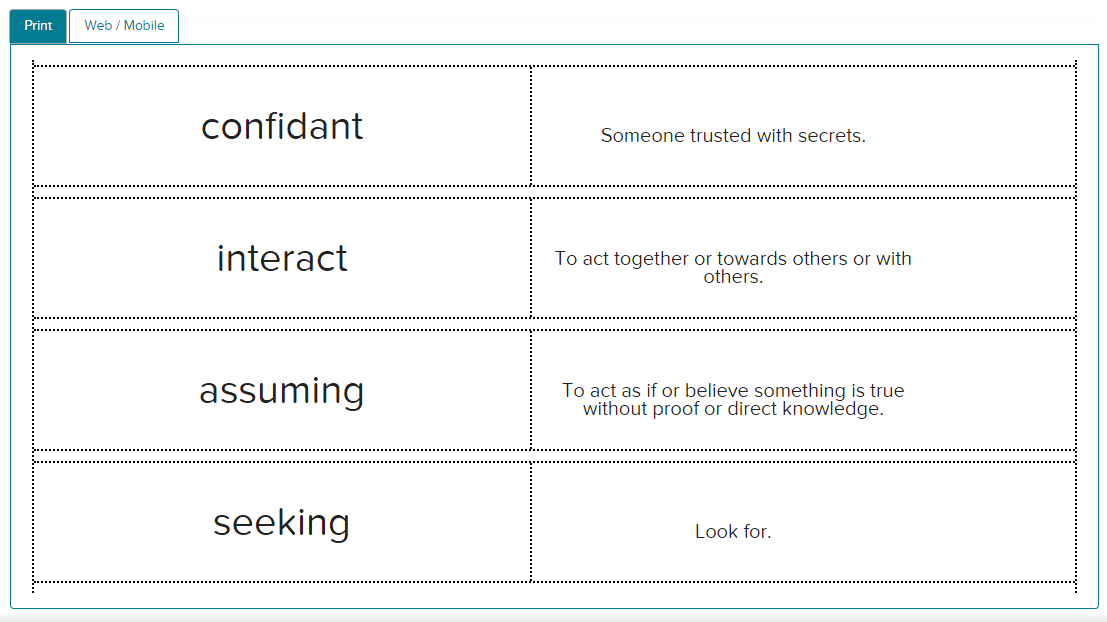
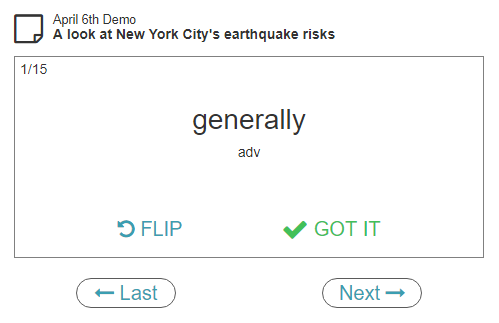
 Flash Cards

 Question Lists


LessonWriter creates printable vocabulary flash cards and question lists from your lessons.
- Click Teach, then click the Flash Cards or Question Lists link
- Select your class
- Select lesson
- Check words then click "Submit"
After printing, have students cut and fold individual flash cards.
- Select your class
- Select lesson
- Check questions then click "Submit"
Print question lists for students.
Introduction to Teaching Online
Click Here
All Online Teaching Features require a Premium or School account. Learn more.❐
LessonWriter lessons are available to students on StudentLoginPage.com. Your LessonWriter email account will NOT work on StudentLoginPage.com.
To inspect the student view of a lesson, create an account on StudentLoginPage.com with a different email account. Try Yopmail.com for free, disposable, test email accounts.
Where possible, LessonWriter auto-corrects exercises. Written exercises require your corrections through our easy-to-use GradeWork feature.
Assign Lessons
All Online Teaching Features require a Premium or School account. Learn more.❐
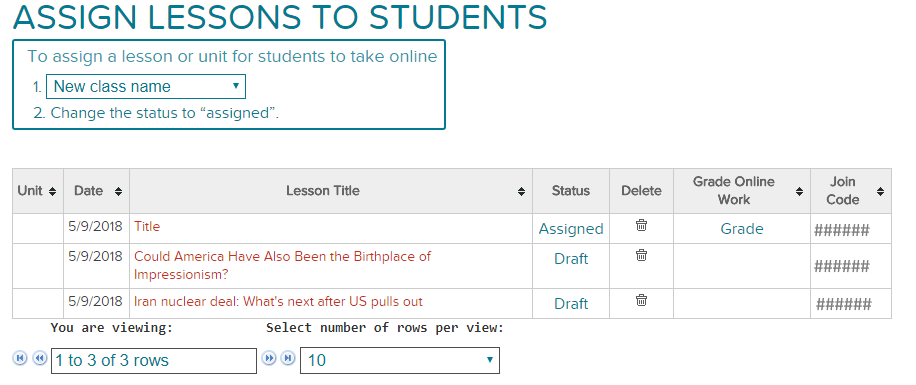
"Assigned lessons" are available for students to take online
- Go to the Manage section and click the "Assign work" link in the Students column.
- Select the Class and lesson you want to teach.
- Click the Status link and change the setting to "Assigned".
- Go the Classes section and get the Join Code for the appropriate class.
- Share the Join Code with your students
- Have students register at StudentLoginPage.com (Only necessary the first time; students can add unlimited Join Codes to the same account.)
- Tell them to insert the Join Code on the registration page.
- When the students login, the lessons assigned will be available for them to take online.
Grade Lessons
All Online Teaching Features require a Premium or School account. Learn more.❐
When the students take and submit a lesson, you can grade it, award credit and add comments, then save the graded lesson or assign to re-take.
- Navigate to LessonWriter -> Manage-> Grade online work
- Select the class
- Open the lesson to grade
- Choose the action next to the students name (Grade or re-grade)
- Open the lesson section to grade
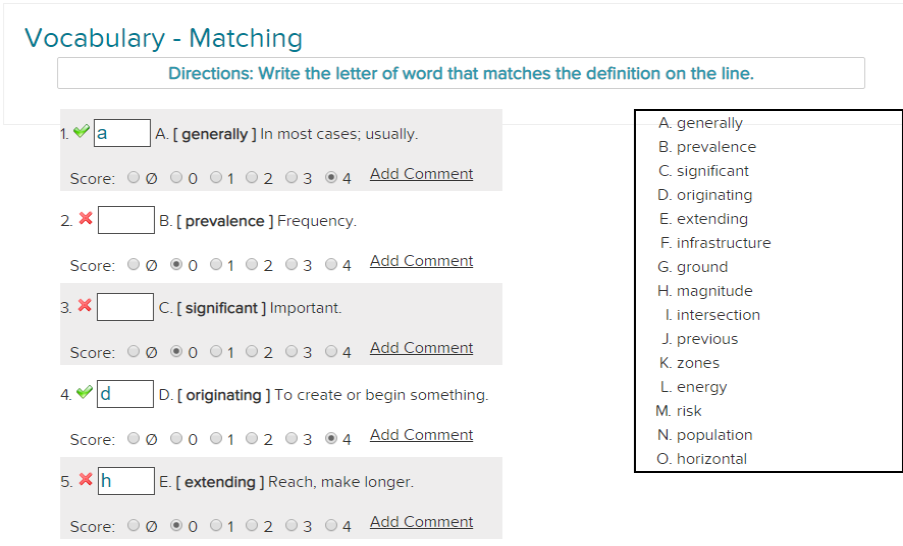
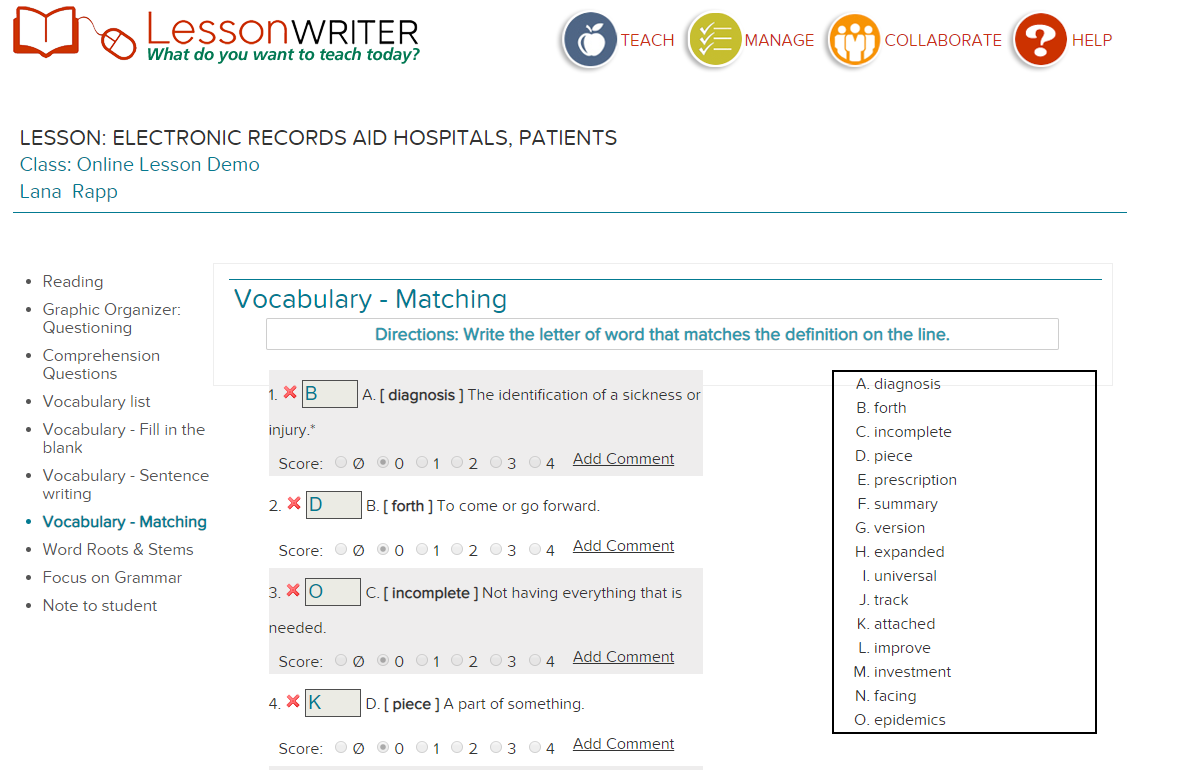
Some parts of the lesson, like matching and multiple choice exercises, are auto-corrected.
Other exercises are graded by hand.
-
Correction options include:
- award partial credit (1-4).
- adding individual comments
- When you are done, you may click "Save" or "Assign to re-take". Your student will immediately be able to see the score, corrections and comments.
Messaging

All Online Teaching Features require a Premium or School account. Learn more.❐
You can create new messages and send them to teachers or students by choosing their usernames. You can reach your messages in your inbox.
- Click "Inbox"
- Click "New message"
- Write a new message
- Choose"Teachers" or "Students" tab
- Choose students and/or teachers from the list; click "Send"
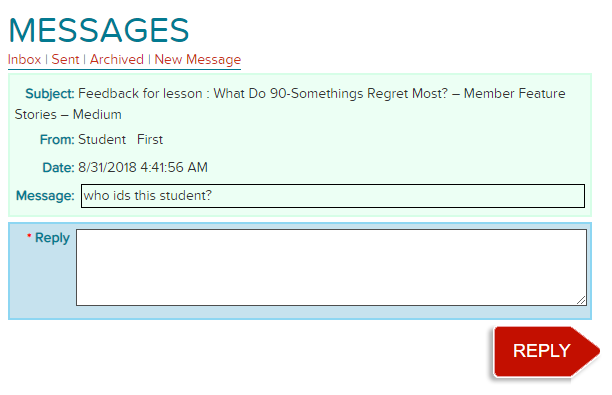
- Click "Inbox"
- Click the subject of the message
- Write answer
- Click "Reply"
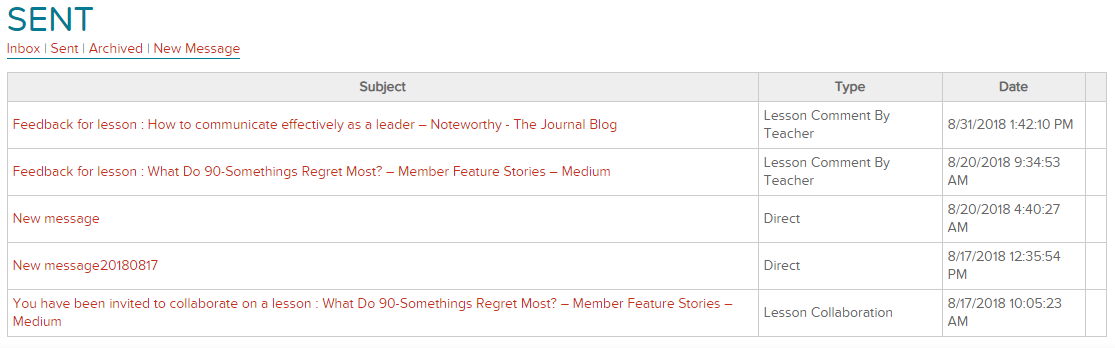
- Click "Inbox"
- Click "Sent"
- View message
Online Study Aids
Flash Cards
 Question Lists

All Online Teaching Features require a Premium or School account. Learn more.❐
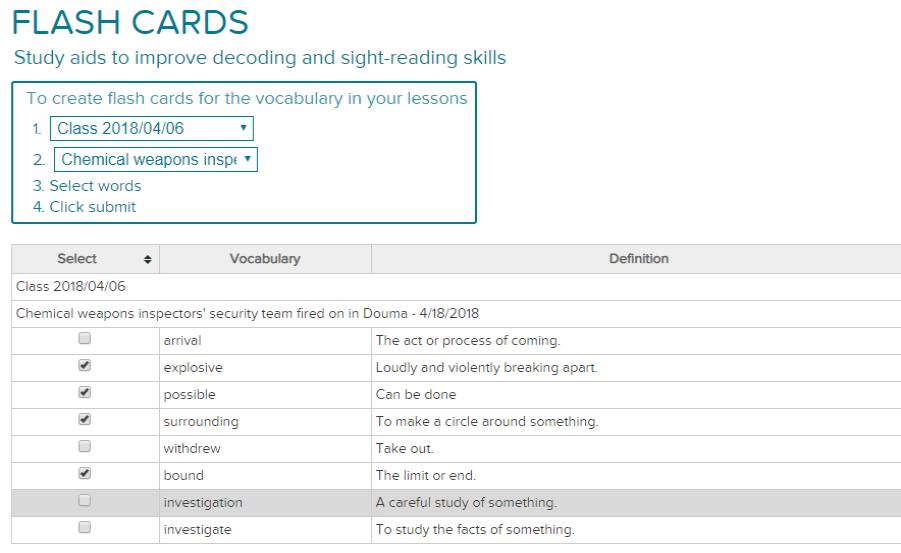
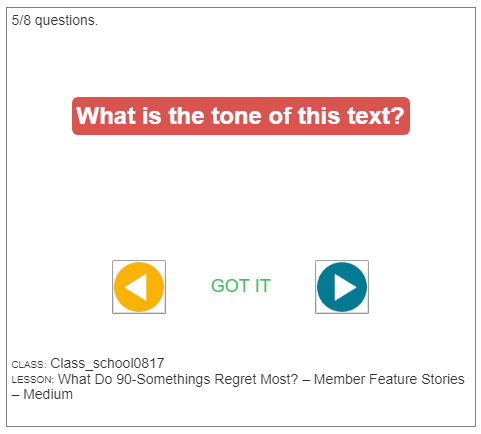
LessonWriter creates online flash cards and question lists based on the words taught in your lessons.
- Click Teach, then click the Flash Cards or Question Lists link
- Select your class
- Select lesson
- Check vocabulary words and click "Submit"
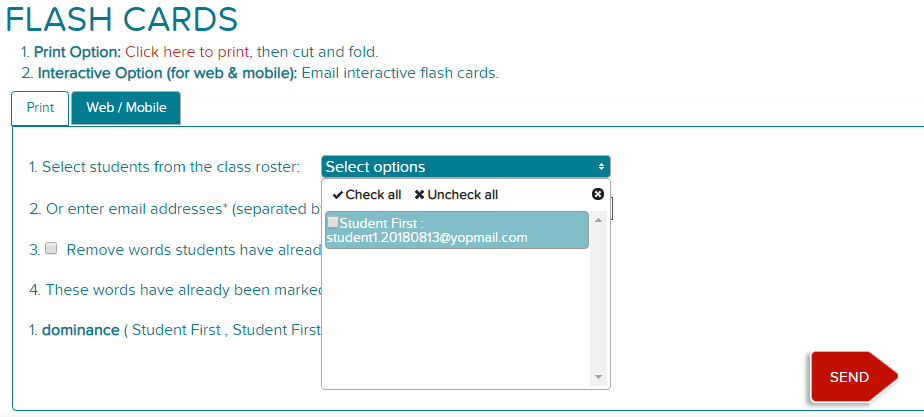
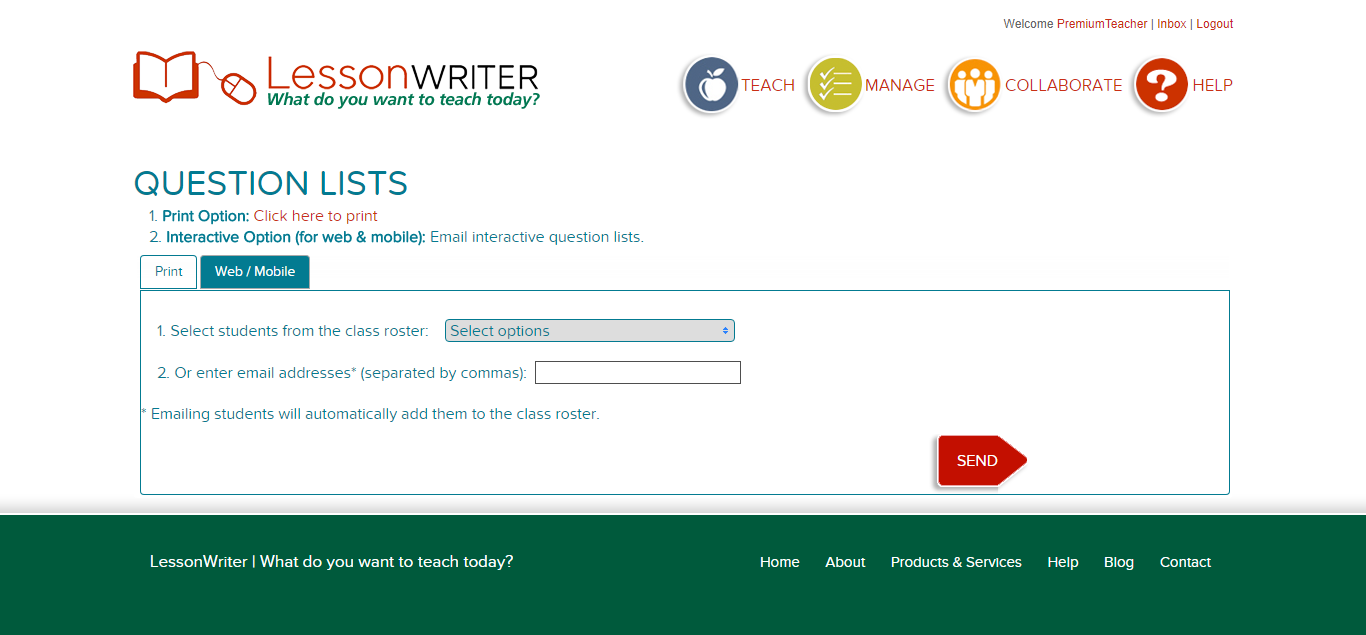
- Click "Web/Mobile" tab
- Select students to send Flash Cards to
The Flash cards will be immediately available in the student's online account.
- Click Teach, then Question Lists
- Select your class
- Select lesson
- Check vocabulary words and click "Submit"
- Click "Web/Mobile" tab
- Send Question Lists to students
Sharing Lessons

All Online Teaching Features require a Premium or School account. Learn more.❐
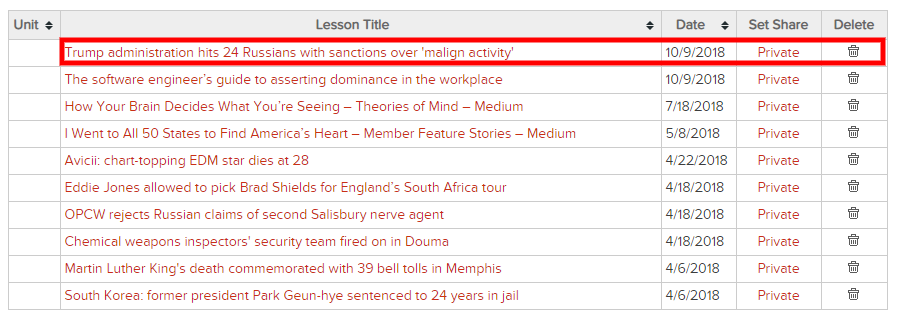
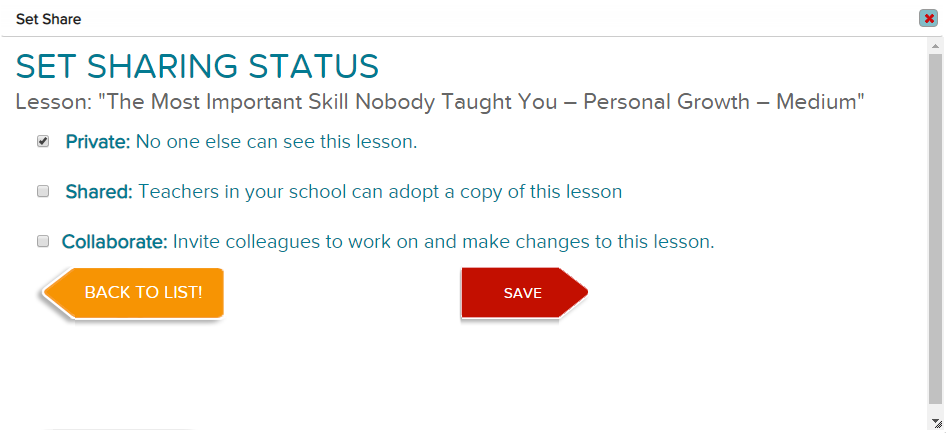
When you set a lesson to share, your colleagues are able to find your lessons and use Adopt into their own classes.
- Click "Collaborate"
- Click "Set lessons to share"
- Select your class
- Click the sharing link next to the lesson
- Set lesson to share; click "Save"
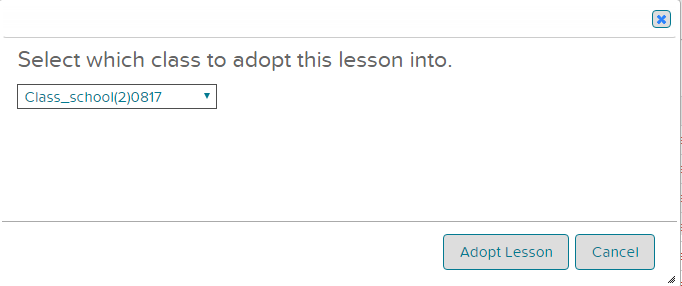
You can also Adopt lessons into your classes that other teacher's have set to Share.
- Go to Collaborate
- Click "Colleagues' lessons"
- Click "Adopt"
- Select class
- Click "Adopt lesson"
The lesson is now included in your class list.
Collaborating on Lessons
All Online Teaching Features require a Premium or School account. please go to our Products page
You can work on lessons with your colleages. When a lesson is set to "Collaborate", all the teachers with permission to make changes can update the lesson. At any time, any teacher can Adopt the lesson to save the current version. To collaborate with other teachers:
- Click "Collaborate"
- Click "Set lessons to share"
- Select your class
- Click the sharing link next to the lesson
- Set lesson to Collaborate
- select teachers you want to invite to collaborate; click "Save"
You may create as many classes as you need by choosing the "Create a new class" option.
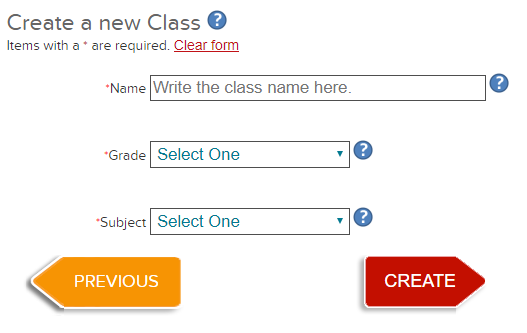
- Click "Create/ Edit Classes."
- Choose on "Create a new class".
- Fill in the Class name, grade, and subject fields.
- Click "Create a new class," complete the fields, and click "Create".
- Click Here
Create as many classes as you need.
Differentiate Instruction
Tasks and content can be adjusted to fit the needs of different students.
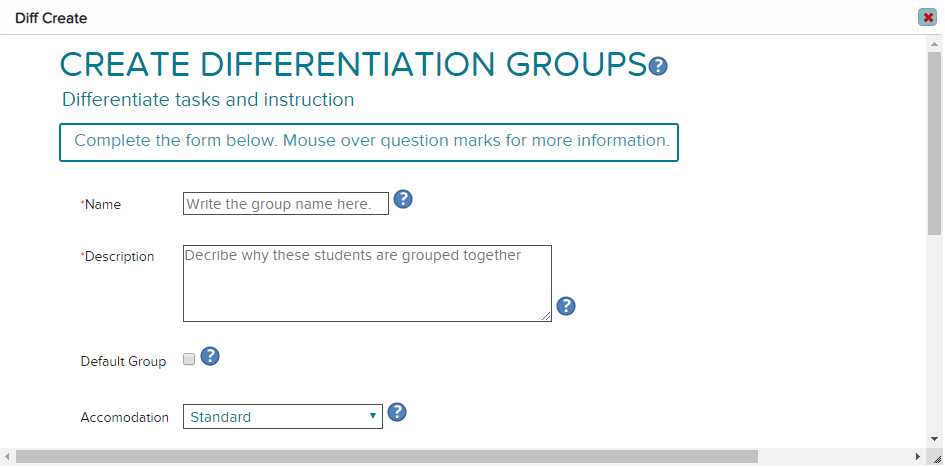
You can create as many differentiation groups in your classes, as needed, then tasks can be assigned to each differentiation group.
- Go to Manage
- Click "Differentiation groups"
- Select your class
- Click "Create new differentiation group"
- Enter the details of the group (name, description, etc.)
- Set Critical Thinking and Task type goals
- Click "Save"
Sheltered Instruction
Sheltered instruction is including ESL and Literacy support to content area teaching to provide students with comprehension assistancde and practice the language of the content area.
On the Differentiation Groups page, you can selectively use Sheltered Instruction to fit the needs of different groups.
- Go to Manage
- Click "Differentiation groups"
- Select your class
- Click "Create new differentiation group"
- Enter the details of the group (name, description, etc.)
- Set Critical Thinking and Task type goals
- Click "Save"
Creating Tasks
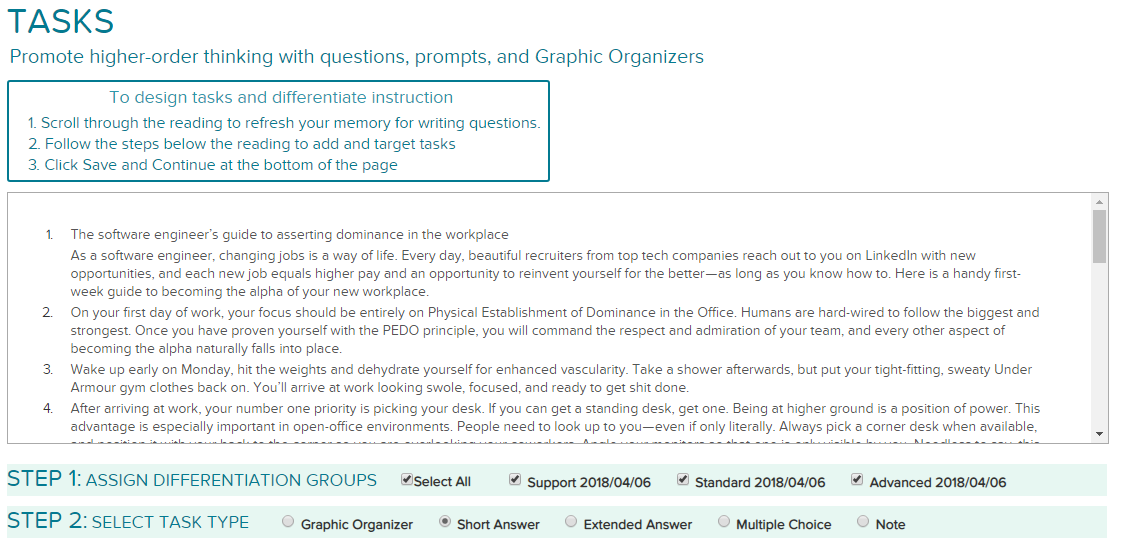
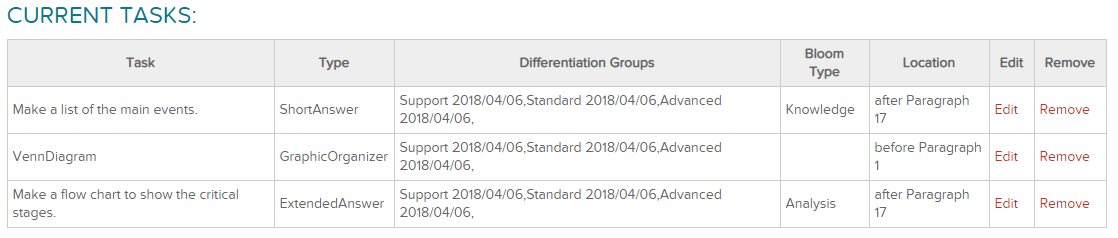
The Task page is where you create and edit tasks for your lessons. It's part of the Standard and Detailed lesson making processes, but is also reachable from the edit menu on the Lesson sheet. You can choose from a variety of prepared questions or write your own tasks. You are also able to choose task types and assign them to differentiation groups.
To create a task
- In step #1, select which students should get the task.
- In step#2, select what type of task you are creating.
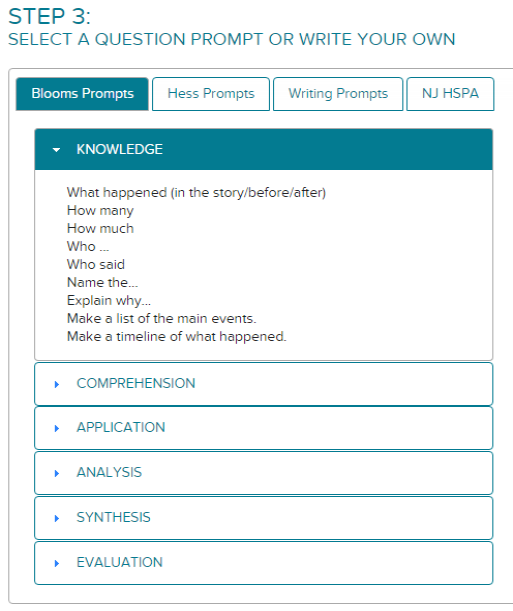
- In step #3, you may optionally use a question prompt to start your question.
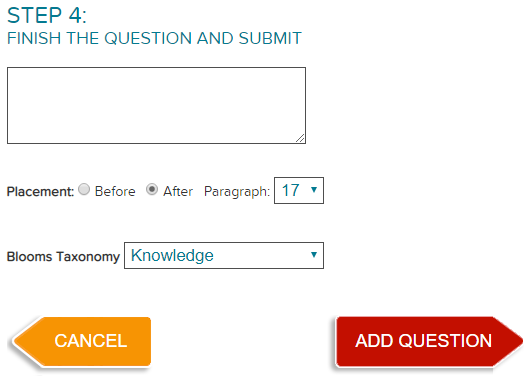
- Step #4 is where you complete and position the task.
You may review, edit, or delete tasks in the Current Tasks table.
Custom Dictionaries
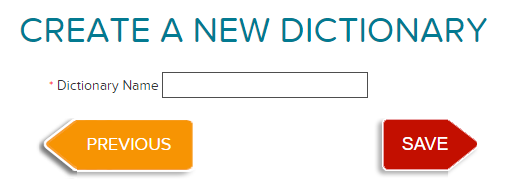

You are able to create and edit dictionaries customized to your students' needs.
- Click "Manage"
- Click "Dictionaries"
- Click "Create new"
- Enter the name -> click "Save"
You can then apply these dictionaries where appropriate.
Creating and using Units
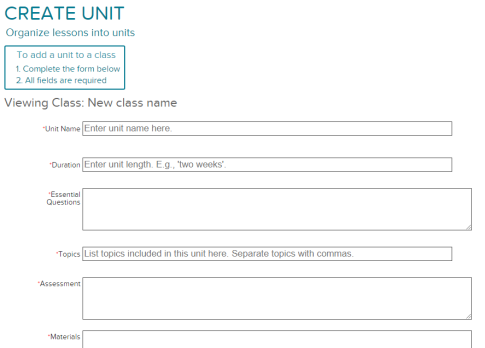
Creating Units is an easy way to group and organize your lessons.
- Go to Manage -> Organize Curriculum
- Select the class
- Click "Create New Unit"
- Complete the form / Organize lessons into units
- Click "Create"
- Click Here
Adding Standards to Lesson Plans
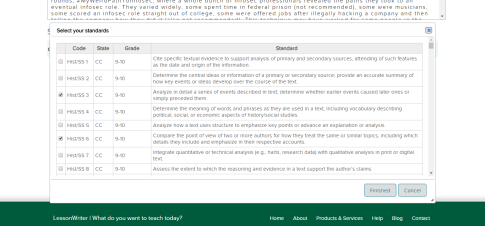

You can select Standards on the Preview Lesson page, when you create a new lesson. Click "Select Standards" button to view standards appropriate for your class and account.
If you want to add standards to an existing lesson, you can do it by navigating to the Lesson Plan page, then clicking "Select Standards" button.
- Create a new lesson.
- Click "Select Standards" on the Preview Lesson screen.
- Select your standards, click "Finished".
- Finish creating your lesson.
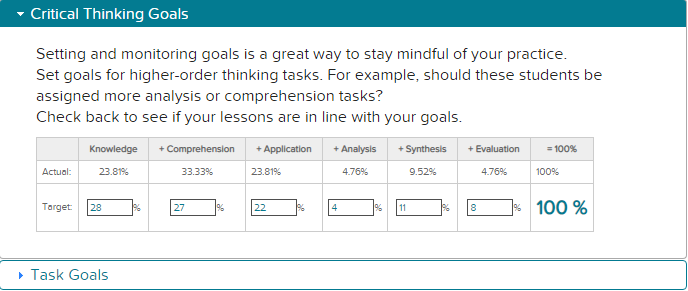
Setting and Monitoring Goals
As the school year goes on, the day-to-day demands of teaching and classroom management make it hard to stay on top of our Differentiated Instruction goals.
Setting goals for our instructional practice (like the kinds tasks our students will perform and the critical thinking skills we'll emphasize) can help us stay on track with differentiated instruction.
- Go to Manage -> Differentiation Groups
- Select the class.
- Select the group you want to set or monitor goals for (or click "Create a new differentiation group".)
- Under the Sheltered Instruction heading, click "Critical Thinking Goals.
- Set your goals for the different types of tasks.
- Create a lesson.
- Check back to see if your lessons are in line with your goals.
This teacher's Target Goals and Actual lessons are very close!
Creating a school
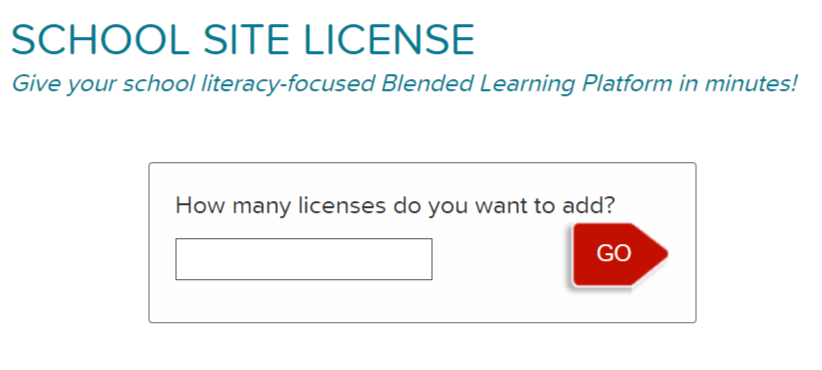
Creating a school is as simple purchasing licenses for you teachers and providing the school name.
- Go the School Site License page in the Products & Services section.
- Add the school name.
- Set the number of teachers (including yourself) to see the price.
- Click on "Buy Now"
- Follow the instructions to pay by credit card or Paypal.
- When the purchase is complete, your account will be designated the school Principal, and you will be able to assign licenses to teachers.
Using the School Dashboard


After your school has been created,just click on the title "Principal" in the top left corner of the screen.
The first table shows your school license information, including the Join code to share with teachers and the number of licenses assigned and available.
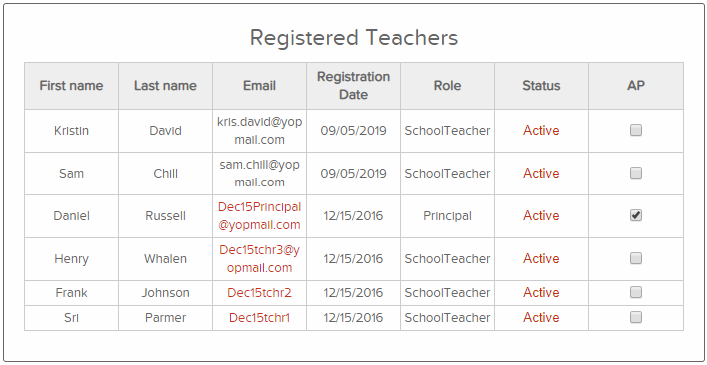
The second table displays all the teachers with active accounts. Here you can click a teacher's email to view class records, de-activate accounts, and assign Assistant Principal privileges.
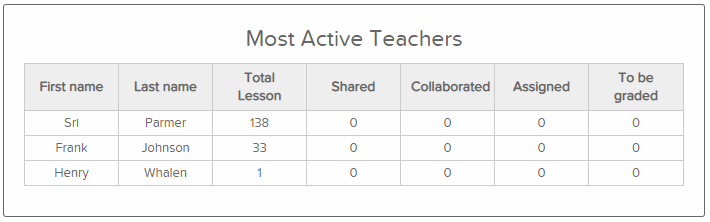
The next table provides a quick view of which teachers have used Lessonwriter lately.
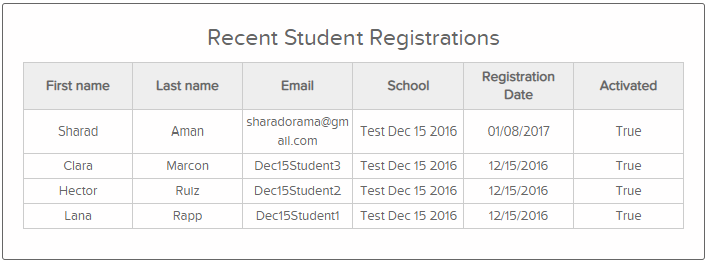
The following control shows recent student registrations.
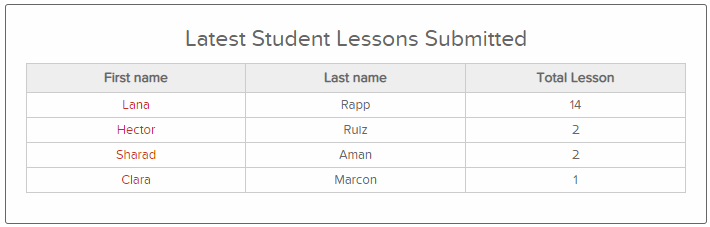
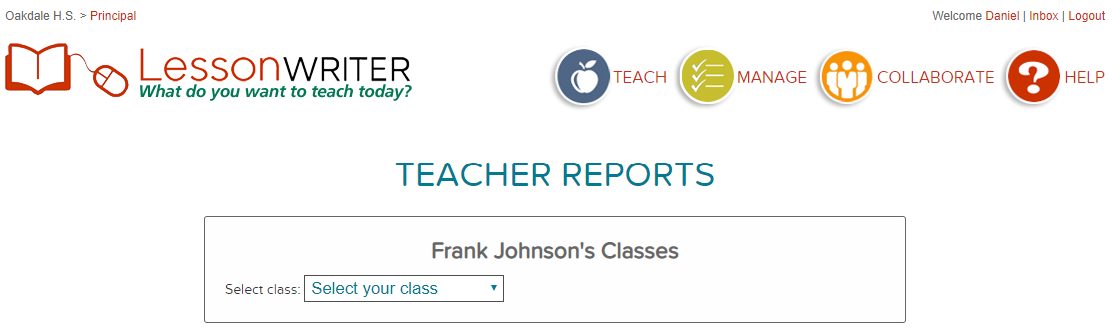
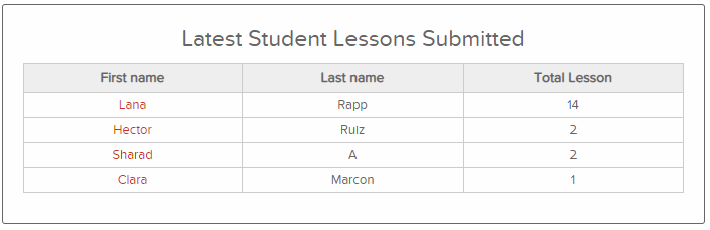
The final control shows student lessons submitted. Click on a student name to view class and lesson reports.
Adding assistant principals
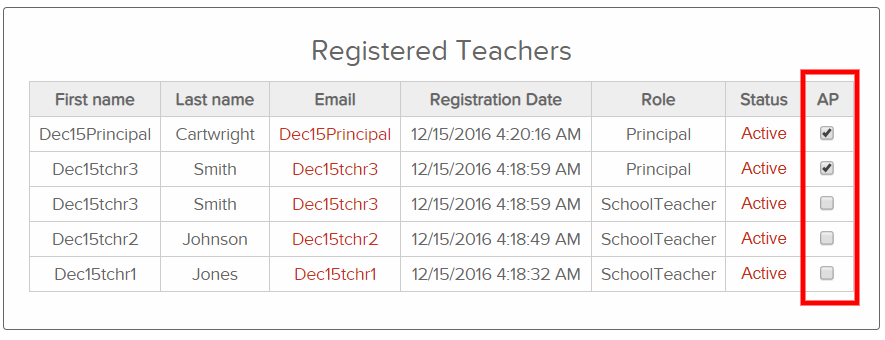
Sharing the Principal's role is simple using the "A.P" check-boxes in the Registered Teachers section of the Principal's dashboard.
- In the teacher list, click the check-box in the "A.P" column for any teacher you are granting privileges to.
- Uncheck the box to remove the privileges.
Teacher Accounts

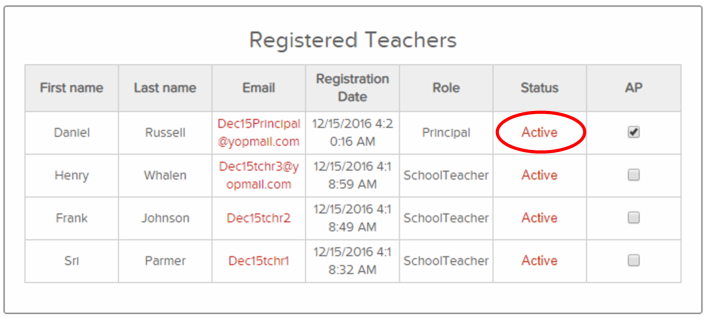
Teachers join your school by adding the school's JOIN code to their Account profile.
- Copy the JOIN code in the License Subscription Info section of the Principal's dashboard.
- Share the JOIN code with your teachers and instruct them to add it to their account profiles.
- Click the "Active" to remove a teacher's license. Another teacher may now use that license.
Monitoring teacher activity


It's easy to view teacher lessons and monitor the literacy skills taught in their classes.
Click on a teacher name in the list to see a list of classes
Click on a class name to see a list
The "Differentiation Groups" link displays how the lessons are tailored to student needs.
The Literacy Skill link shows the literacy skills taught in the class
And the tasks link shows a scrollable list of questions and tasks
Monitoring Student Work
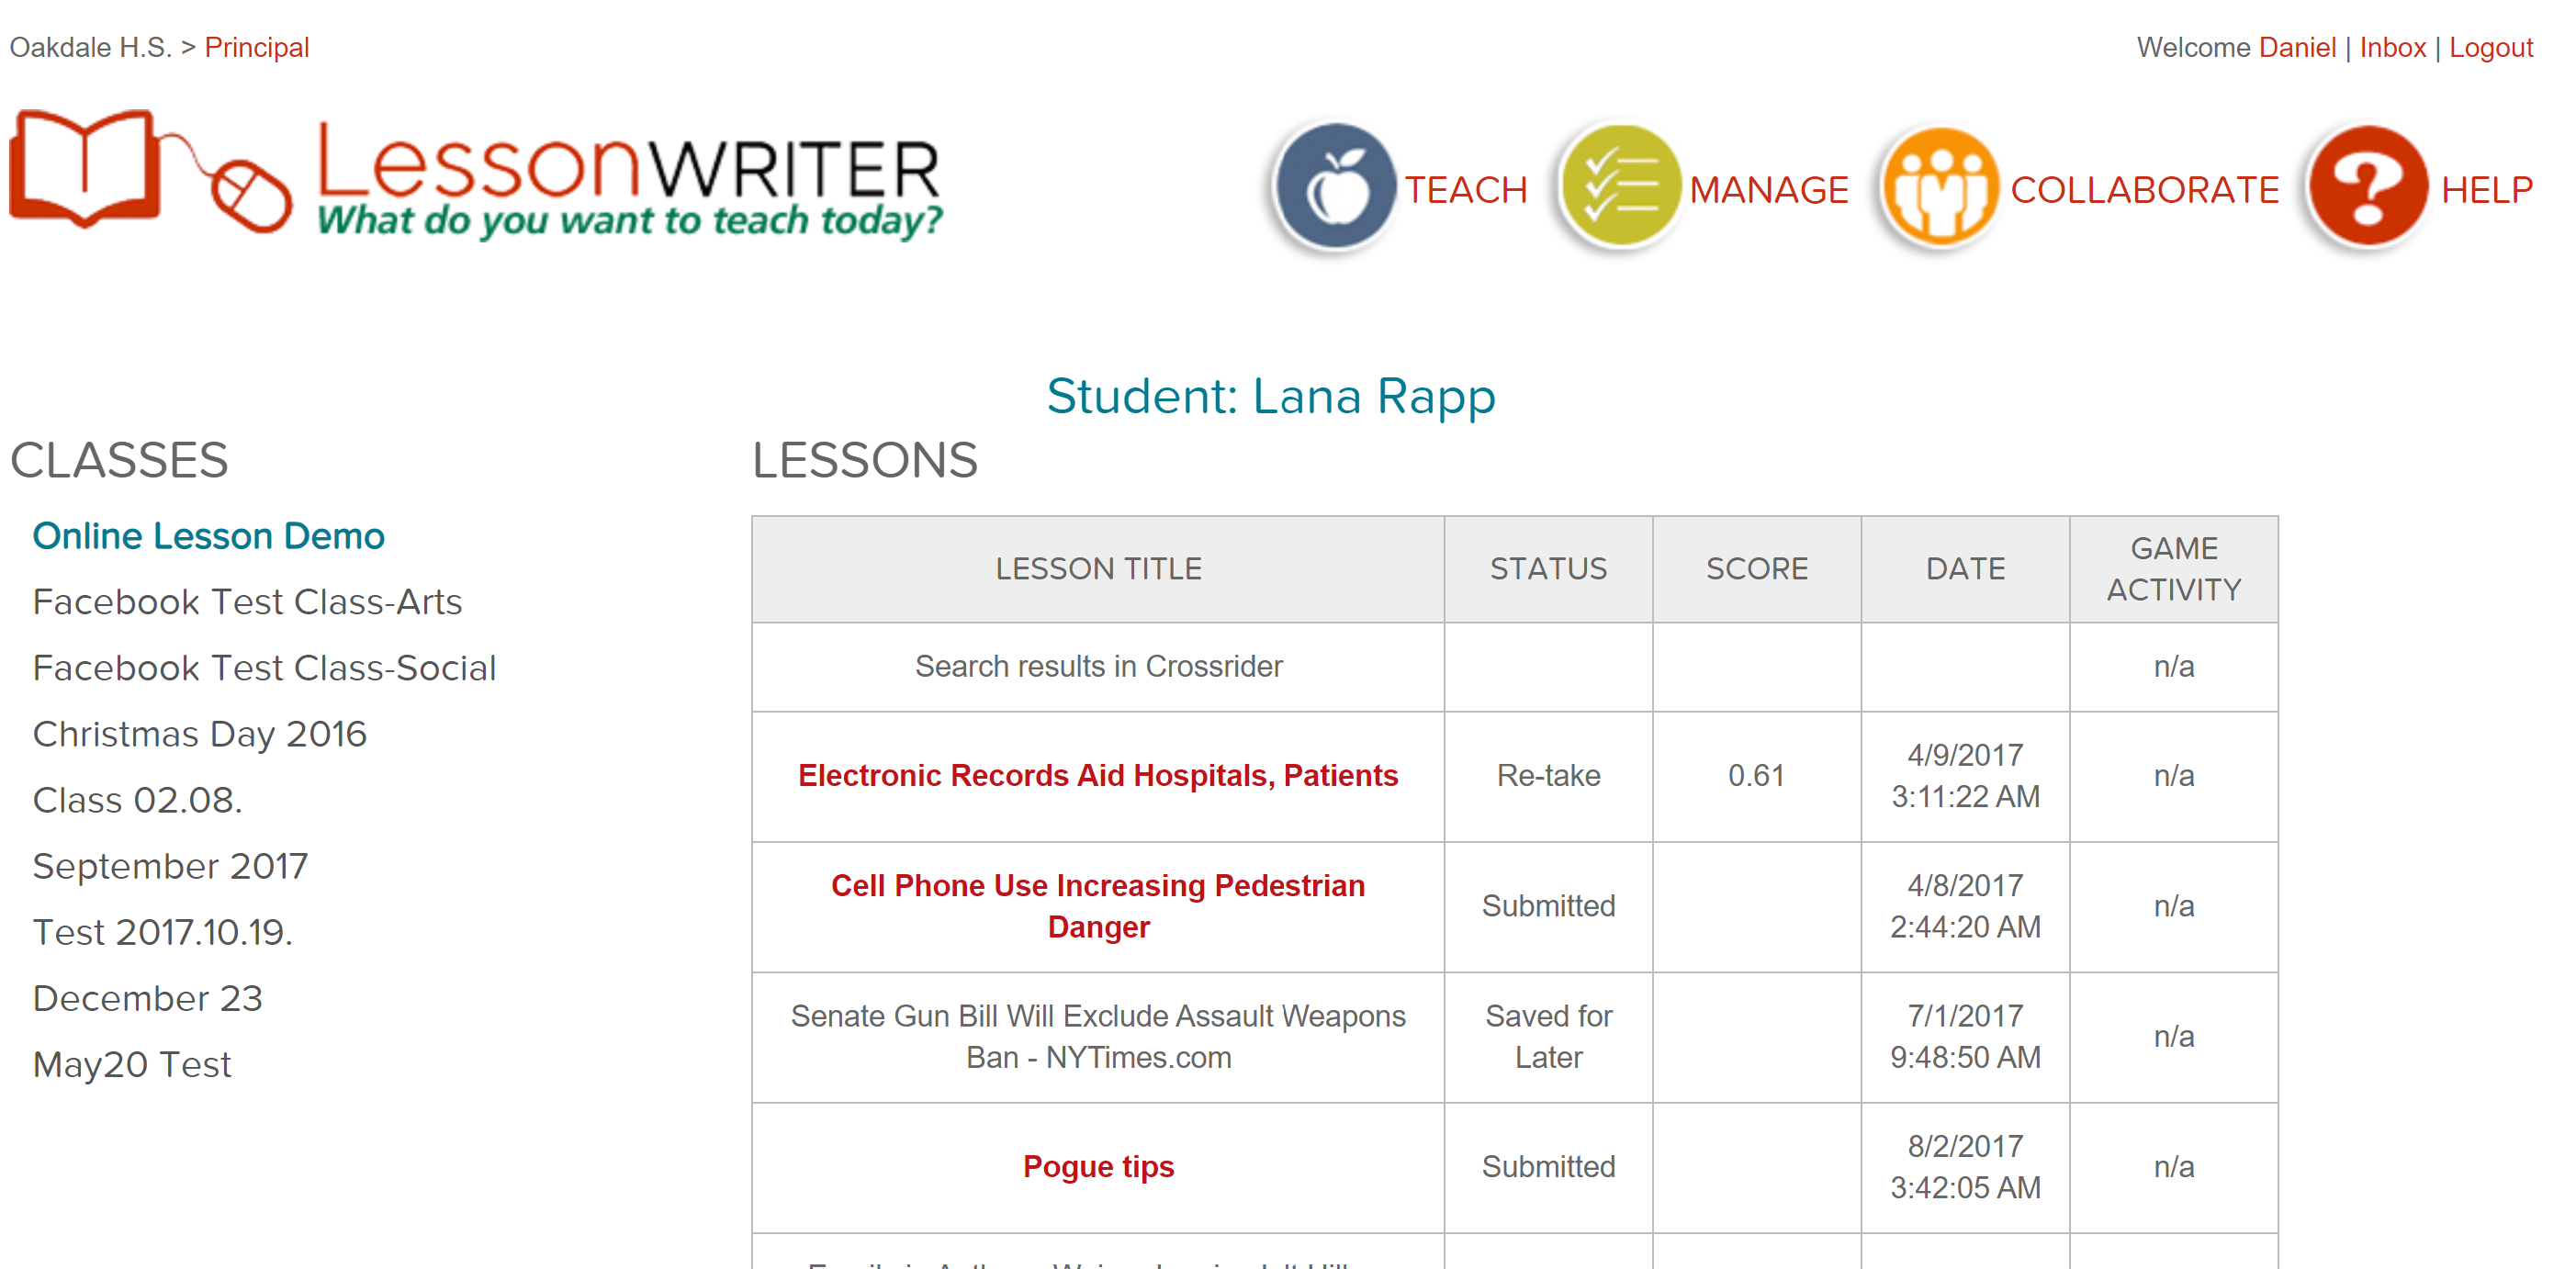
You can review student performance class-by-class, see all of the lessons have students have been assigned, examine their work and see the teacher's comments and corrections.
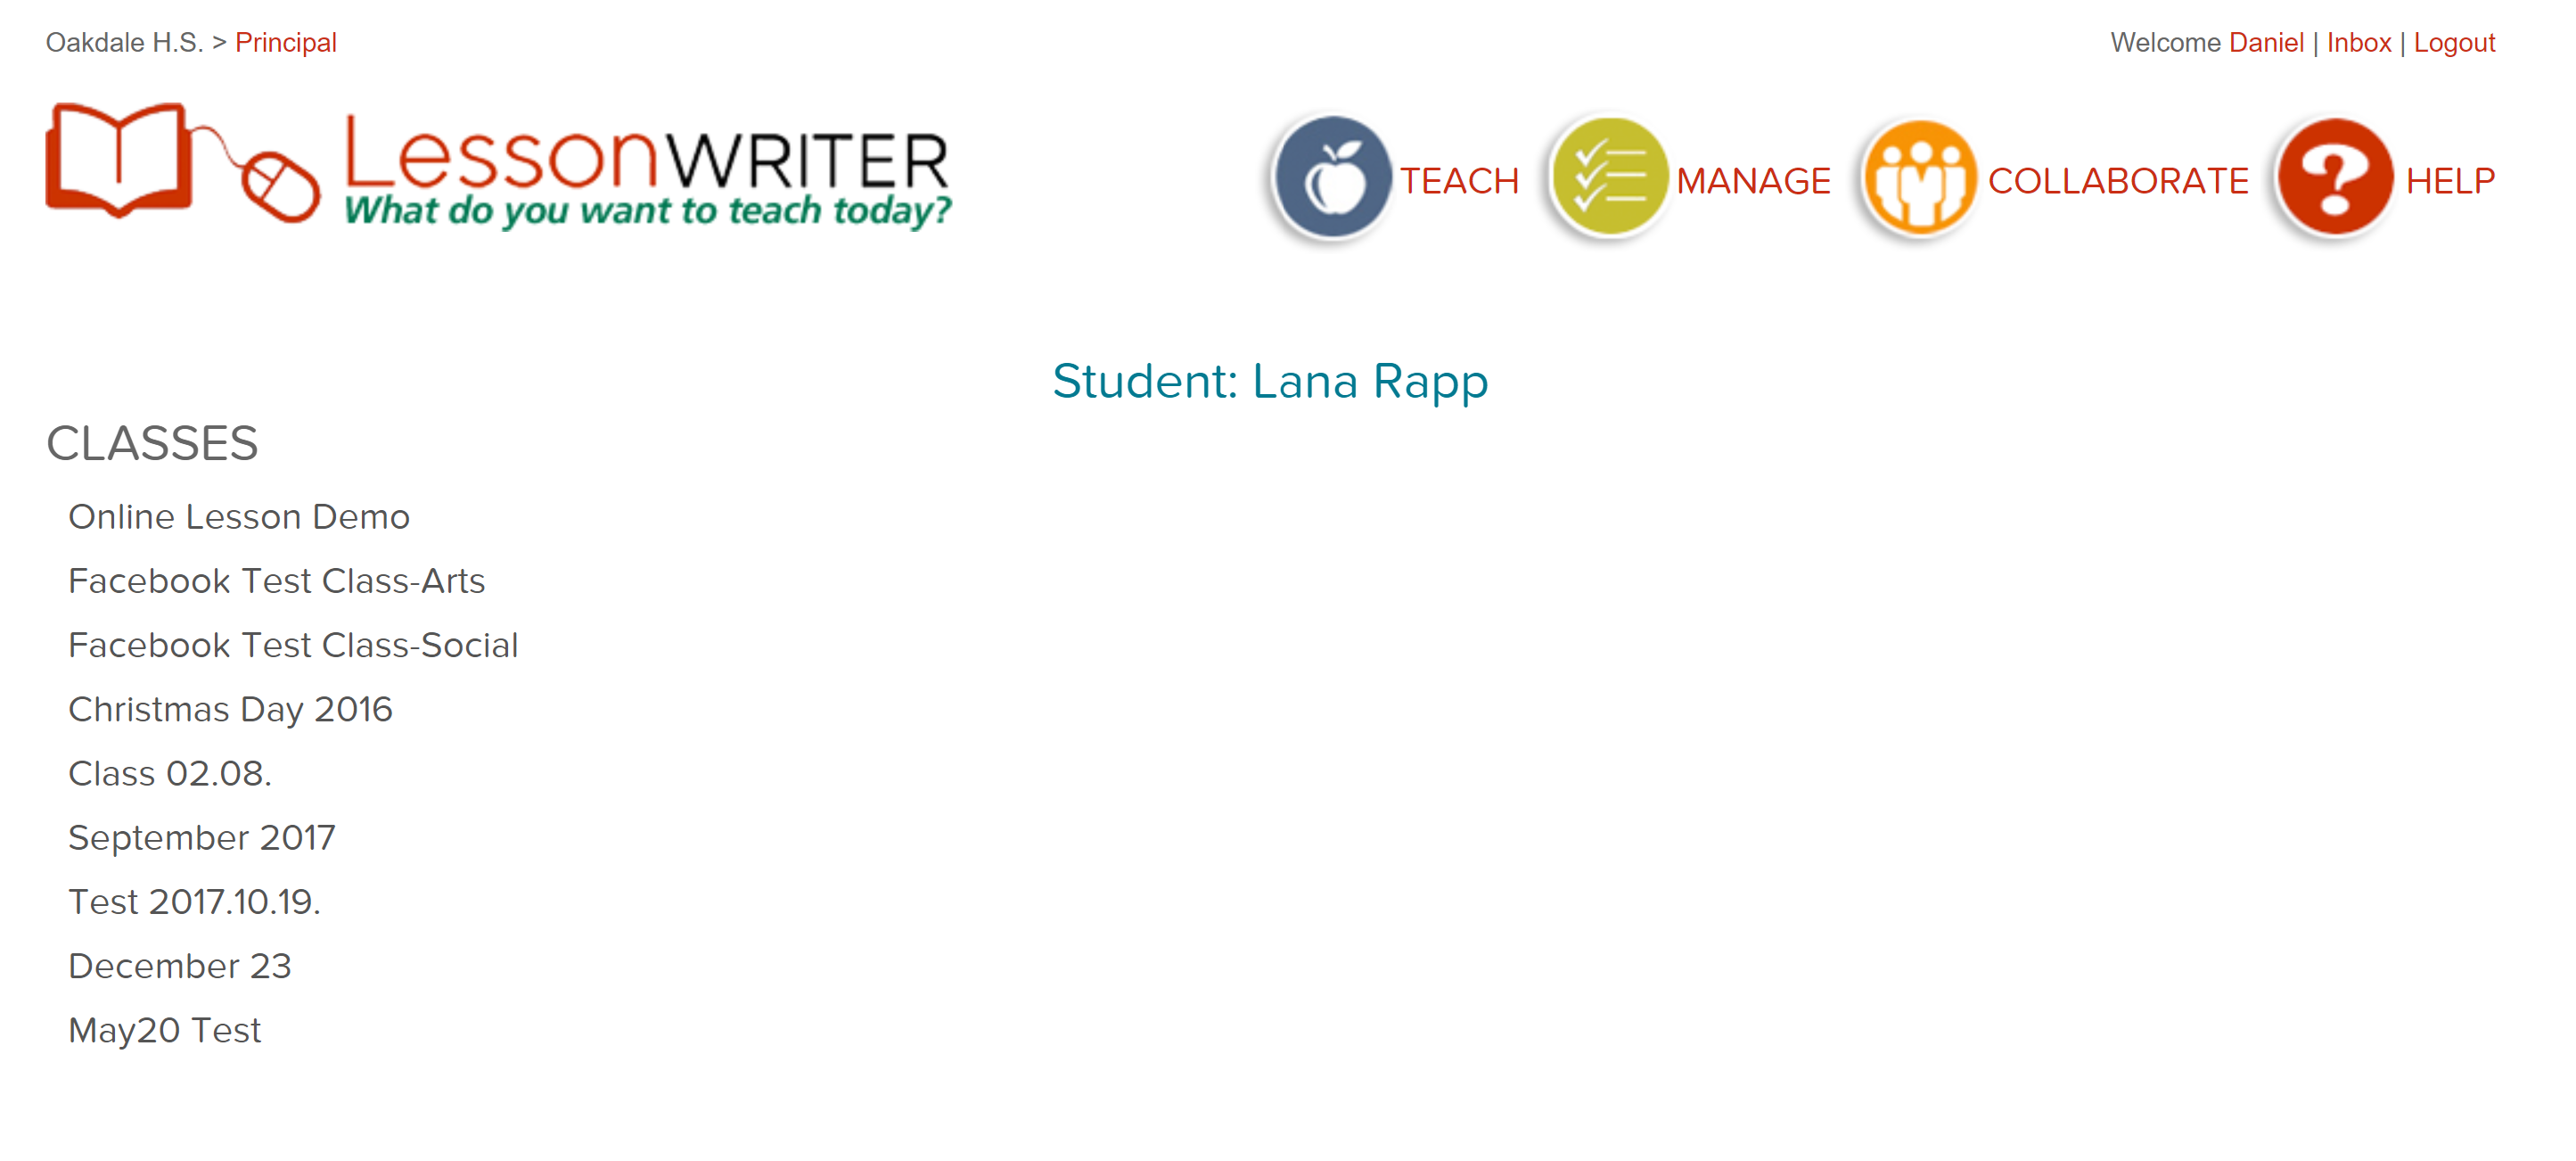
Click on a student name on the Student Report list to see a list of lessons that students has completed.
Click on a class name to view lessons from that class.
Click on a lesson to open it and review the student's work.
Click through the lesson components to see view the student's work
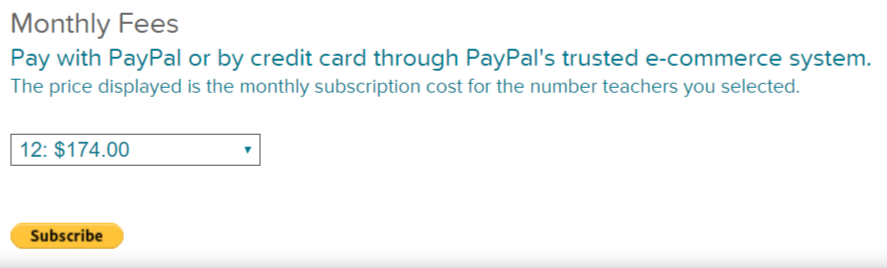
Adding licenses

You can add additional licenses to your school at any time.
- Log in with the school's "Principal" account.
- In the License Subscription Info section of the Principal's Dashboard, click "Purchase more licenses"
- Set the number of new licenses
- Click "Subscribe"
A
- Accommodations
-
Lessonwriter Accommodations are pre-set lesson formatting options to support readers at different skill levels. You assign Accommodations to Differentiation Groups. There are three ways to format a reading:
- STANDARD teaches all the vocabulary before the reading.
- SUPPORT breaks the readings into chunks and pre-teach just the vocabulary in that chunk, making the text more manageable for struggling readers.
- ADVANCED does not pre-teach the reading.
- Adopt
- To Adopt a lesson means to take a lesson created by someone else and add it one (or more) of your classes. After you adopt a lesson, it is yours to edit and update to suit your students' needs.
- Authentic materials
- Authentic materials refers to reading materials created for a purpose other than teaching. LessonWriter was created to generate teaching materials from prose.
C
- Classes
- Classes are the fundamental organization unit of LessonWriter. All lessons are created inside of a class.You may have an unlimited number of classes.
- Collaborate
- (Requires School teachers only) Collaborating on a lesson means that more than one teacher can make changes. When collaborating, you may adopt the lesson at any time to save that version. Then there are two copies: the Collaborative version that can still be updated by the other teachers, and the Adopted version that can only be updated by you.
- Critical Thinking Goals
- With Lessonwriter's Critical Thinking Goals, you can set what percentage of tasks you plan to assign using the categories of Bloom's Taxonomy (Knowledge, Comprehension, Application, Analysis, Synthesis and Evaluation). Setting and monitoring goals is a great way to stay mindful of your practice.
- Custom Dictionary
- Teachers may create custom dictionaries to add their own definitions to words which can be used in place of the LessonWriter definition.
D
- Default Group
- When creating Differentiation Groups, you assign one group as the Default Group. New students are automatically added to the Default Group. Later, you may assign them to a group that suit their needs better.
- Dictionary
- Lessonwriter's learner's dictionary is under constant review.
- Differentiated Instruction
- Differentiated Instruction means teaching students according to their needs. LessonWriter facilitates differentiating by making it easy to create multiple versions of the same lesson, each with different tasks, instruction, and presentation, to fit your students needs.
- Differentiation Groups
- Lessonwriter Differentiation Groups are class groups based that make it easy to adjust tasks and content to individual student's needs . For example, you can easily assign extra vocabulary practice to one group and longer writing assignments to another. You can even ask different questions of different groups.
E
- Extended Answer Questions
- Extended Answer questions allow you to set any number of lines to a writing assignment. For example, you may set 5 lines for a short paragraph or 30 for a three paragraph essay. Extended Answer questions are set on the Task page.
F
- FlashCards
- Flashcards may be printed and handed out to students, or assigned on line.
G
- Goals
- Setting goals for how much emphasis you will give to certain Task types (e.g., writing, short answer or multiple choice questions) and Critical Thinking (e.g, Comprehension or Analysis) is an optional part of Differentiating Instruction. After you set your goals, LessonWriter tracks your lessons so you can check back to see how closely you are following your goals.
- Grammar
- Explicit Instruction
- Graphic Organizers
- Graphic organizers help students visualize information.
L
- Lesson
- A lesson is the fundamental instructional unit LessonWriter creates, and may consist of any combination of reading, literacy support, and comprehension tasks.
- Literacy Support
- Lessonwriter's Literacy Support options are Differentiation Group settings that allow you to assign Vocabulary, Pronunciation, Word Building, and Grammar to Differentiation Groups as needed.
M
- Multiple Choice
- Multiple Choice questions can be added to lessons on the Task page. You are able to define four possible answers and choose the correct one. When teaching online, Multiple Choice questions are automatically graded.
P
- Lesson Plan
- Lessonwriter automatically generates a lesson plan for each lesson.
- Pronunciation
- Pronunciation skills are recommended based on best-practices sequencing of instruction.
Q
- Question Lists
- All of the questions used in lessons are available to be printed or used online as study aids.
R
- Roots & Stems
- Roots and Stems are the name used for word-building exercises that utilize prefixes and suffixes to build vocabulary.
S
- Scaffolding
- Lessonwriter presents literacy skills instruction- pronunciation, word roots and stems and grammar- in skill building sequences, so each lesson's exercises build upon previous exercises.
- Teachers may share lessons with colleagues in the same school.
- Sheltered Instruction
- "Specify Literacy Support and set Critical Thinking and Task type goals for each differentiation group. Vocabulary, Pronunciation, Word Building, and Grammar"
- Short Answer
- Short Answer questions display a single-line space for the student response. These can be placed strategically throughout the text.
- Standards
- Lessonwriter makes it easy to match your lessons to a variety of state and Common Core standards. Simply click "Select Standards" button to view standards appropriate for your class and account when you create a new lesson.
T
- Tasks
- Exercise prompts, question prompts, graphic organizers, and writing prompts are all on each lesson's Tasks page.
- Task Goals
- You can set goals for the types of tasks (e.g., Graphic Organizers, extended answer questions, etc.) you assign to each Differentiation Group. Lessonwriter tracks the exercises you create and measures them against your goals to help you reflect on how your practice meets your vision.
U
- Units
- Teachers have the option of organizing classes in units.